


In the last post, we covered why version control matters and some of the key concepts behind Git. We didn't touch a terminal. That changes now!
This is the hands-on section. By the end, you'll have Git installed, a repository created, branches worked with, a merge conflict resolved, and your first pull request opened on GitHub. Every example uses network config files because that's the world we work in.
In the next post, we go deeper into Git and version control with an optional Git Mastery section. We'll go through some more advanced features, the "why and when" to use certain commands, and some more complex scenarios.
Let's get to it!
Prerequisites
You'll need three things:
A machine to work on with either Linux, macOS, or Windows. If you're on Windows, I'd recommend using WSL (Windows Subsystem for Linux) to follow along, but Git Bash works too. I'll be using macOS.
A text editor. VS Code is the go-to for most and is what we'll be making use of (as well as some Nano), but anything works. Nano, Vim, Sublime, whatever you're comfortable with.
A GitHub account. If you don't have one, head to github.com and sign up. The free tier is all we'll need. GitHub is the most popular platform for devs and open-source projects.
Installing Git
Linux (Debian/Ubuntu):
sudo apt update && sudo apt install git -y
macOS:
# If you have Homebrew, highly recommend it.
brew install git

# Or just run 'git' in terminal, macOS will prompt to install Xcode CLI tools which includes Git
Windows (WSL):
If you're running WSL, follow the Linux instructions above. If you're not using WSL, download Git from git-scm.com.
Verify it's installed:
git --version
# git version 2.43.0 (or similar)

Initial Configuration
Before you do anything with Git, you need to tell it who you are. This information gets attached to every commit you make.
git config --global user.name "Your Name"
git config --global user.email "[email protected]"
# You can set your git email and name per repo, or globally, like above.
Use the same email you signed up to GitHub with, this is how GitHub links commits to your account.
Some other sensible defaults while we're here:
# Set the default editor (VS Code in this case). Recommended.
git config --global core.editor "code --wait"

# Set the default branch name to 'main'. This will be default in Git v3.0.
git config --global init.defaultBranch main
You can check your config at any time:
git config --list
Setting Up SSH Authentication for GitHub
You can use HTTPS to connect to GitHub, but SSH is cleaner and easier in the long run. No typing passwords every time you push. Let's set it up once and forget about it.
Generate an SSH key:
ssh-keygen -t ed25519 -C "[email protected]"
Hit enter to accept the default file location. Add a passphrase if you want (recommended), or leave it blank.
Start the SSH agent and add your key:
eval "$(ssh-agent -s)"
ssh-add ~/.ssh/id_ed25519
Copy your public key:
cat ~/.ssh/id_ed25519.pub
Copy the entire output.
Add it to GitHub:
Go to GitHub > Settings > SSH and GPG keys > New SSH key. Give it a name (like "Home Laptop"), paste the key, and save.
Test the connection:
ssh -T [email protected]
# Hi username! You've successfully authenticated...
Done. You won't need to think about this again.
Your First Repository
Let's create a repo that simulates managing network device configurations. This is the kind of thing you'd realistically use Git for day one.
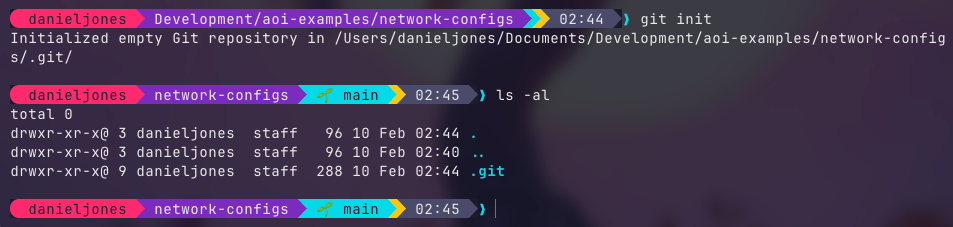
Create the project directory and initialise Git:
mkdir network-configs
cd network-configs
git init
You'll see:
Initialized empty Git repository in /your-directory/network-configs/.git/
That .git folder is where Git stores everything. Don't touch it, just know it's there. If you're on Linux, Mac or WSL, you can use ls -al to view the hidden folder.
Create your first config file:
mkdir configs
Create a file called configs/core-sw01.cfg with the following example content:
! core-sw01 - Core Switch 01
! Site: London DC
!
hostname core-sw01
!
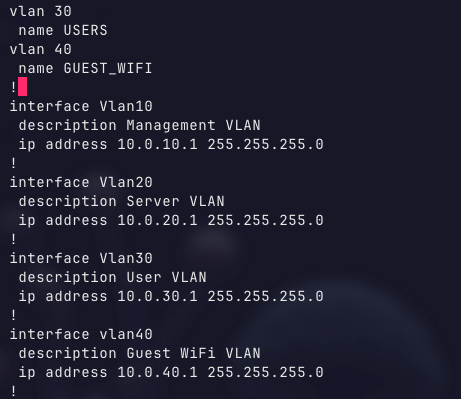
vlan 10
name MANAGEMENT
vlan 20
name SERVERS
vlan 30
name USERS
!
interface Vlan10
description Management VLAN
ip address 10.0.10.1 255.255.255.0
!
interface Vlan20
description Server VLAN
ip address 10.0.20.1 255.255.255.0
!
interface Vlan30
description User VLAN
ip address 10.0.30.1 255.255.255.0
!
ip default-gateway 10.0.10.254
!
line con 0
logging synchronous
line vty 0 4
transport input ssh
!
end
Check the status:
git status
On branch main

No commits yet

Untracked files:
  (use "git add <file>..." to include in what will be committed)
	configs/

nothing added to commit but untracked files present (use "git add" to track)
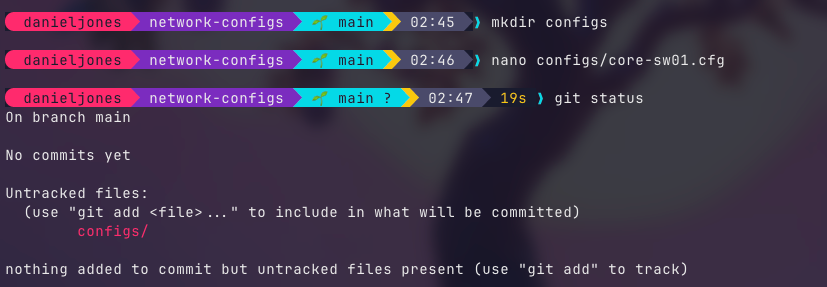
Git sees the file but isn't tracking it yet. This is an important point, Git doesn't automatically track everything in the folder. You choose what to include.
Stage and commit:
git add configs/core-sw01.cfg
git commit -m "Add initial config for core-sw01"
[main (root-commit) a1b2c3d] Add initial config for core-sw01
 1 file changed, 34 insertions(+)
 create mode 100644 configs/core-sw01.cfg

That's your first commit. Let's break down what just happened.
git add . to add all files to the staging area, instead of manually adding the files you wish to be part of the next commit.git add moves the file into the staging area. Think of this as a "ready to commit" zone. You can stage multiple files and commit them together as one logical change.
git commit -m creates the snapshot with a message describing what you did.
View the history:
git log
commit bcd39c8 (HEAD -> main)
Author: Your Name <[email protected]>
Date:   Tue Feb 10 02:50:21 2026 +0000

    Add initial config for core-sw01

One commit, one entry. As you make more changes, this log grows and becomes your audit trail.
For a more compact view:
git log --oneline
a1b2c3d (HEAD -> main) Add initial config for core-sw01
Join our new Discord community where we discuss everything; infra, networking, cloud, AI and much more. Come vent, discuss tech problems, or just have a place to hang out with like-minded individuals.
Making Changes and Tracking Them
Now let's make some changes. You've been asked to add a new VLAN for a guest wireless network.
Open configs/core-sw01.cfg and add the following after the existing VLAN definitions:
vlan 40
 name GUEST_WIFI
And add a new interface section:
interface Vlan40
 description Guest WiFi VLAN
 ip address 10.0.40.1 255.255.255.0
Before committing, let's see what Git thinks has changed:
git status
On branch main
Changes not staged for commit:
  (use "git add <file>..." to update what will be committed)
	modified:   configs/core-sw01.cfg
Want to see the actual changes?
git diff
@@ -9,6 +9,8 @@ vlan 20
  name SERVERS
 vlan 30
  name USERS
+vlan 40
+ name GUEST_WIFI
 !
 interface Vlan10
  description Management VLAN
@@ -22,6 +24,10 @@ interface Vlan30
  description User VLAN
  ip address 10.0.30.1 255.255.255.0
 !
+interface vlan40
+ description Guest WiFi VLAN
+ ip address 10.0.40.1 255.255.255.0
+!
 ip default-gateway 10.0.10.254
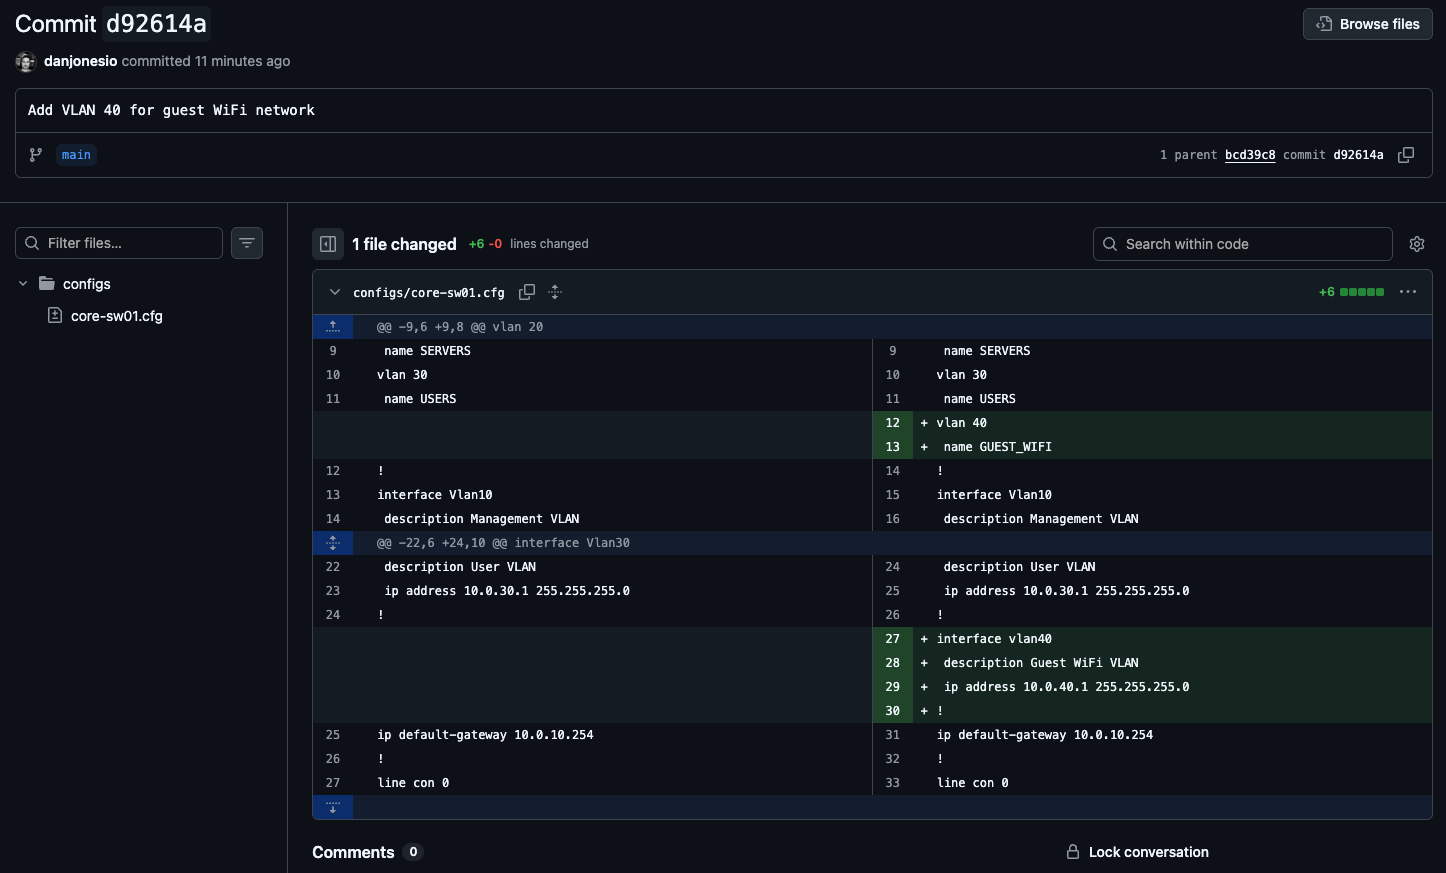
Lines starting with + are additions. Lines with - are removals. This is the same format you'll see in pull requests on GitHub. Get used to reading diffs, it's one of the most useful skills in Git (albeit made easier when using the GitHub GUI later).
Stage and commit:
git add configs/core-sw01.cfg
git commit -m "Add VLAN 40 for guest WiFi network"
Check the log:
git log --oneline
b2c3d4e (HEAD -> main) Add VLAN 40 for guest WiFi network
a1b2c3d Add initial config for core-sw01

Two commits in the books with a clear history, you can see exactly what changed and when.
Setting Up .gitignore
Before we go further, let's talk about files you don't want in Git. There's always going to be stuff in your project directory that shouldn't be tracked; credentials, temporary files, IDE settings, lab-specific files, poem(s) to your loved one.
By telling Git what to ignore, these files and directories will never be tracked or pushed to remote(s).
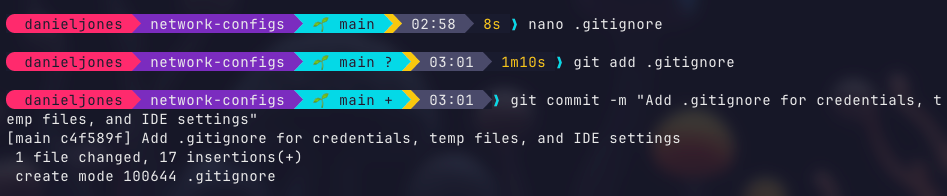
Create a .gitignore file in the root of your repo:
# Credentials and secrets
*.key
*.pem
secrets/
.env

# Editor and IDE files
.vscode/

# OS files
.DS_Store
Thumbs.db

# Lab and temp files
*.bak
*.tmp
lab-notes/
Commit it:
git add .gitignore
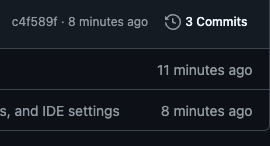
git commit -m "Add .gitignore for credentials, temp files, and IDE settings"
This is one of those things that's easy to forget early on and a pain to fix later, especially if you accidentally commit a private key. Once something's in Git history, it's there. Removing it later is a headache you don't want. Set up .gitignore early.
Connecting to GitHub
We've been working locally so far. Let's push this to GitHub so it's backed up and shareable.
Create a new repository on GitHub:
Go to GitHub > New Repository. Give it a name (e.g., network-configs), leave description empty, no README, no .gitignore, no license. We already have content locally. Visibility; we can leave on public, since the work we're doing isn't private nor contain anything sensitive. Public means the anyone can view this project (ideal for open-source projects) whereas Private is limited to you and your team.
We won't be creating one in this demo, but feel free to have a go at creating one yourself later.
Link your local repo to GitHub:
Upon creation of your repo in GitHub, you'll receive instructions/ commands on how to set it up with your username and such. Copy the git remote add line.
git remote add origin [email protected]:yourusername/network-configs.gitThis tells Git "there's a remote copy of this repo at this address, call it origin."
Push your commits:
git push -u origin main
The -u flag sets origin main as the default upstream, so future pushes just need git push.
Head to your repo on GitHub. You'll see your config file, your commits, your history, all there!
Click the commits link:
Check out and compare the differences in configuration between each commit.
Look at that! We're doing things!
Working with Branches
Here's where it gets interesting and where Git starts paying for itself on real projects. Let's say, for example, you've been asked to implement a new QoS policy, but you want to develop and test it without affecting the known-good config on main. Well this is where branches come in.
Create and switch to a new branch:
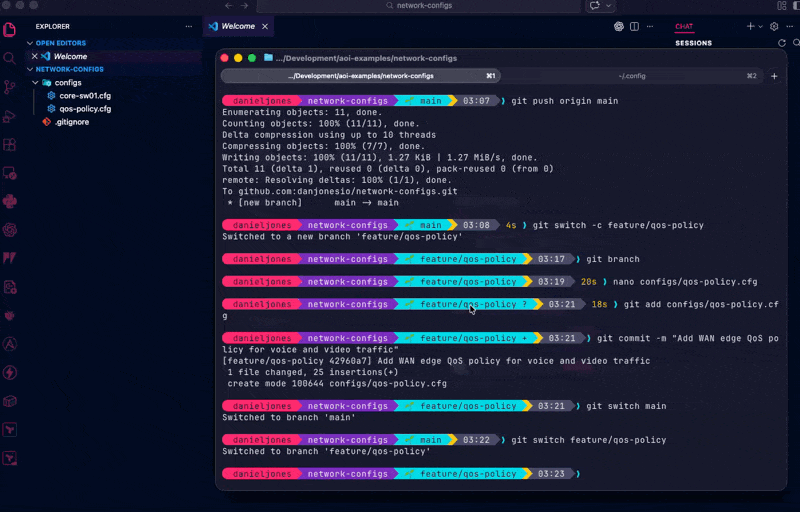
git switch -c feature/qos-policy
Switched to a new branch 'feature/qos-policy'
You're now on a separate branch. Any changes you make here won't affect main.
If at anytime you need to check which branch you're on, use the command git branch. A little * will show next to your working branch.
Or be me and install Starship on Mac and customise your shell;

Create a new file called configs/qos-policy.cfg:
! QoS Policy - Core Network
!
class-map match-any VOICE
 match dscp ef
 match dscp cs5
!
class-map match-any VIDEO
 match dscp af41
 match dscp cs4
!
class-map match-any NETWORK-CONTROL
 match dscp cs6
 match dscp cs7
!
policy-map WAN-EDGE-OUT
 class VOICE
  priority percent 10
 class VIDEO
  bandwidth percent 30
 class NETWORK-CONTROL
  bandwidth percent 5
 class class-default
  bandwidth percent 55
  random-detect
!
Stage and commit:
git add configs/qos-policy.cfg
git commit -m "Add WAN edge QoS policy for voice and video traffic"
Now switch back to main:
git switch main
Look in your configs/ directory, you'll notice qos-policy.cfg isn't there. It only exists on the feature/qos-policy branch. Switch back and it reappears:
git switch feature/qos-policy
ls configs/
# core-sw01.cfg  qos-policy.cfg
This is the power of branches. You can have multiple pieces of work in progress without them interfering with each other.
Merging a Branch
You're happy with the QoS policy, right? Time to bring it into main!
Switch to the branch you want to merge into:
git switch main
Merge:
git merge feature/qos-policy
Updating c4f589f..42960a7
Fast-forward
 configs/qos-policy.cfg | 25 +++++++++++++++++++++++++
 1 file changed, 25 insertions(+)
 create mode 100644 configs/qos-policy.cfg
The QoS config is now on main. Git did a "fast-forward" merge here because there were no conflicting changes; it just moved main forward to include the new commits.
Clean up the branch:
git branch -d feature/qos-policy
Good practice is to delete branches once they're merged. Keep your home in order!
Push changes to remote (GitHub):
git push origin main
# or use 'git push' since we set the remote earlier.
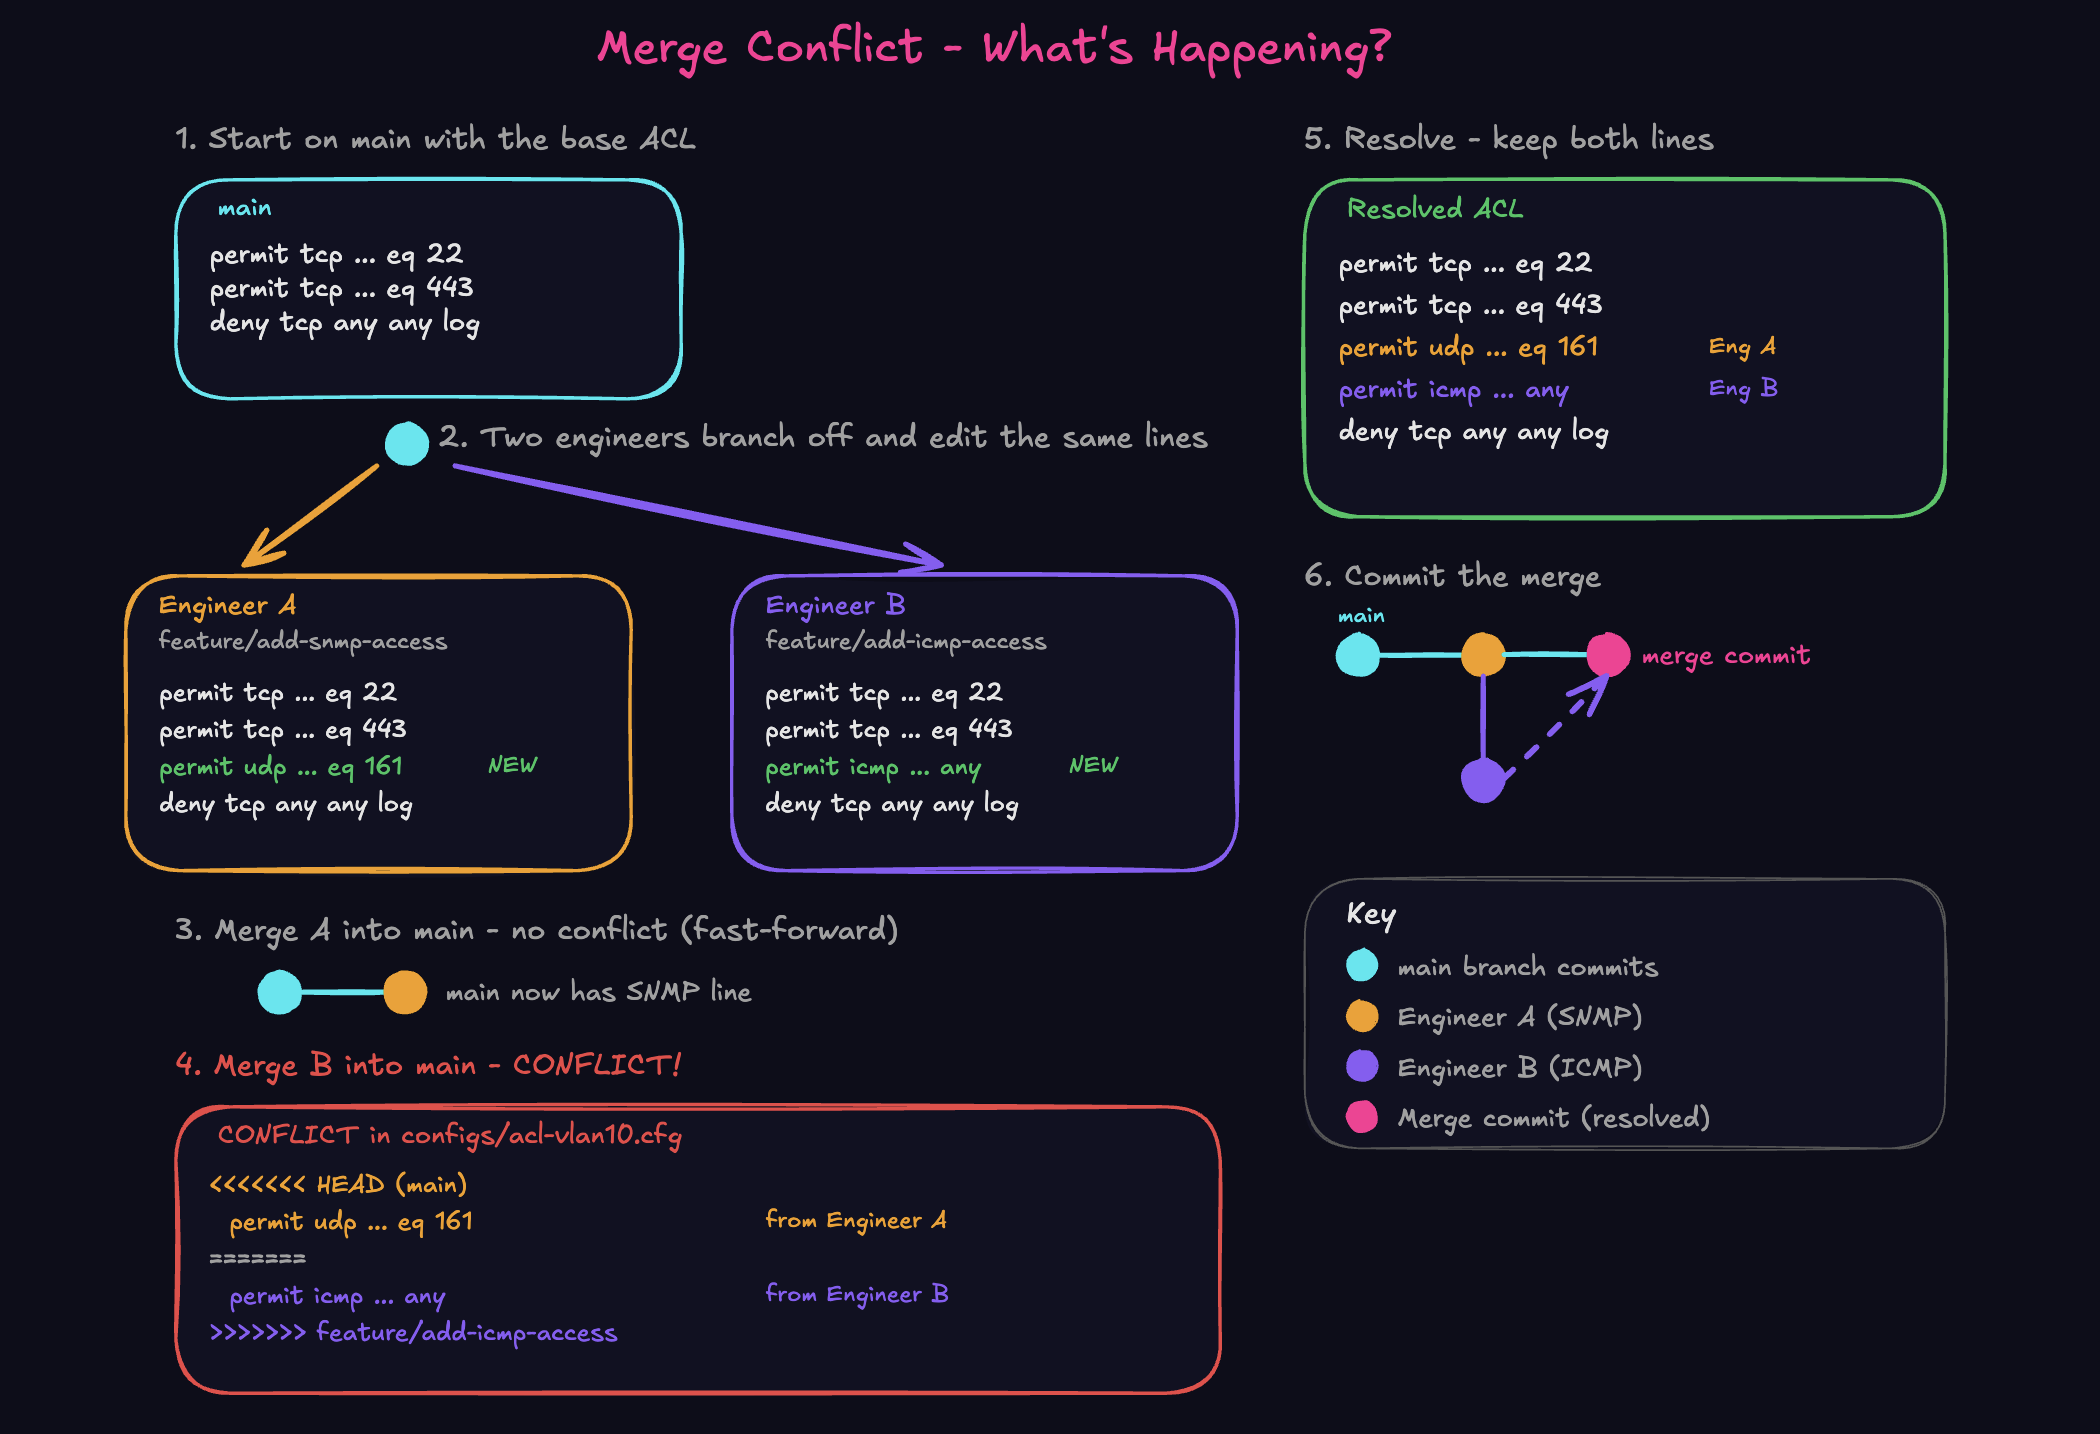
Dealing with Merge Conflicts
Merge conflicts sound intimidating, but they're just Git saying "two changes touched the same lines, and I need you, a human, to decide which one wins". Let's deliberately create one so you know how to handle it.
Set up the scenario, two branches modifying the same ACL:
First, create an ACL file on main:
# Make sure you're on main
git switch main
Create configs/acl-vlan10.cfg:
! ACL for VLAN 10 Management Access
!
ip access-list extended MGMT-ACCESS
 permit tcp 10.0.10.0 0.0.0.255 any eq 22
 permit tcp 10.0.10.0 0.0.0.255 any eq 443
 deny tcp any any log
!
Add and commit the new file:
git add configs/acl-vlan10.cfg
git commit -m "Add management ACL for VLAN 10"
Now simulate two engineers making different changes:
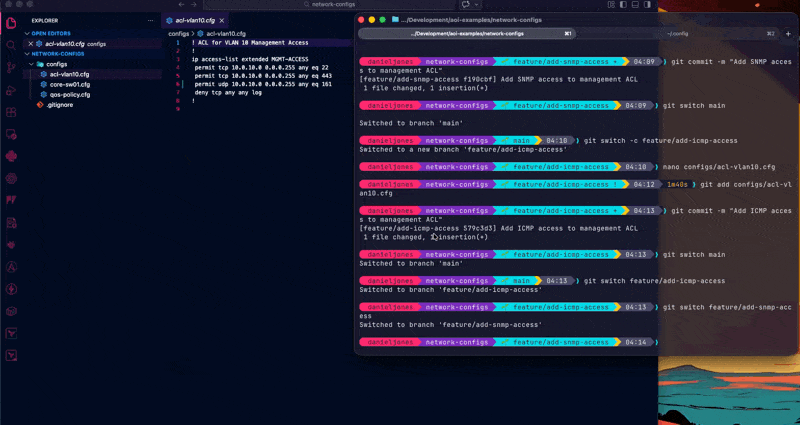
Engineer A creates a branch and adds SNMP access:
git switch -c feature/add-snmp-access
Edit configs/acl-vlan10.cfg , add a new permit line before the deny:
permit udp 10.0.10.0 0.0.0.255 any eq 161
So the ACL section now looks like:
ip access-list extended MGMT-ACCESS
 permit tcp 10.0.10.0 0.0.0.255 any eq 22
 permit tcp 10.0.10.0 0.0.0.255 any eq 443
 permit udp 10.0.10.0 0.0.0.255 any eq 161
 deny tcp any any log
# Make sure you're on the add-snmp-access branch - `git branch`
git add configs/acl-vlan10.cfg
git commit -m "Add SNMP access to management ACL"
Engineer B makes a different change on another branch:
git switch main
git switch -c feature/add-icmp-access
Edit configs/acl-vlan10.cfg , add an ICMP permit before the deny:
# Remember, the changes we made earlier are on another branchs, so do not appear here.

permit icmp 10.0.10.0 0.0.0.255 any
So this version looks like:
ip access-list extended MGMT-ACCESS
 permit tcp 10.0.10.0 0.0.0.255 any eq 22
 permit tcp 10.0.10.0 0.0.0.255 any eq 443
 permit icmp 10.0.10.0 0.0.0.255 any
 deny tcp any any log
git add configs/acl-vlan10.cfg
git commit -m "Add ICMP access to management ACL"
Now merge both into main:
git switch main
git merge feature/add-snmp-access
# This works fine, fast-forward merge
git merge feature/add-icmp-access
# CONFLICT!
Auto-merging configs/acl-vlan10.cfg
CONFLICT (content): Merge conflict in configs/acl-vlan10.cfg
Automatic merge failed; fix conflicts and then commit the result.
Don't panic! Open the file now and you'll see something like this:
ip access-list extended MGMT-ACCESS
 permit tcp 10.0.10.0 0.0.0.255 any eq 22
 permit tcp 10.0.10.0 0.0.0.255 any eq 443
<<<<<<< HEAD
 permit udp 10.0.10.0 0.0.0.255 any eq 161
=======
 permit icmp 10.0.10.0 0.0.0.255 any
>>>>>>> feature/add-icmp-access
 deny tcp any any log
Git is showing you both versions. Everything between <<<<<<< HEAD and ======= is what's currently on main (the SNMP line from the first merge). Everything between ======= and >>>>>>> feature/add-icmp-access is the incoming change.
In this case, we want both. Edit the file to remove the conflict markers and keep both lines:
ip access-list extended MGMT-ACCESS
 permit tcp 10.0.10.0 0.0.0.255 any eq 22
 permit tcp 10.0.10.0 0.0.0.255 any eq 443
 permit udp 10.0.10.0 0.0.0.255 any eq 161
 permit icmp 10.0.10.0 0.0.0.255 any
 deny tcp any any log
Mark it as resolved and commit:
git add configs/acl-vlan10.cfg
git commit -m "Merge ICMP access - resolve conflict with SNMP addition"
That's it. Conflict resolved. In the real world, most conflicts are this straightforward: two people added something in the same place and you just need to combine them sensibly.
Clean up:
git branch -d feature/add-snmp-access
git branch -d feature/add-icmp-access
Push changes to remote (GitHub):
git push origin mainFrom here, running the below command will give you a visual overview of the different branches and how they came to be one.
git log --oneline --graph --decorate --all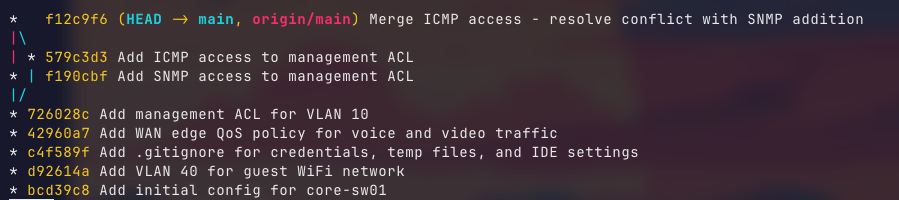
Pull Requests - The GitHub Workflow
So far, we've been merging locally. In a team environment (and even when working solo), pull requests (PRs) are a better workflow (I should really practice what I preach). A PR is like saying "I've made changes on a branch, please review them before they go into main".
This ties back to the change management scenario from Part 1. PRs give you review, approval, discussion, and an audit trail, all built in.
Let's walk through it.
Create a new branch and make a change:
git switch -c feature/ntp-config
Create configs/ntp.cfg:
! NTP Configuration - All Devices
!
ntp server 10.0.10.10 prefer
ntp server 10.0.10.11
ntp source Vlan10
ntp authenticate
ntp authentication-key 1 md5 NTPsecure123
ntp trusted-key 1
!
Add and commit this new file:
git add configs/ntp.cfg
git commit -m "Add NTP configuration with authentication"
Push the branch to GitHub:
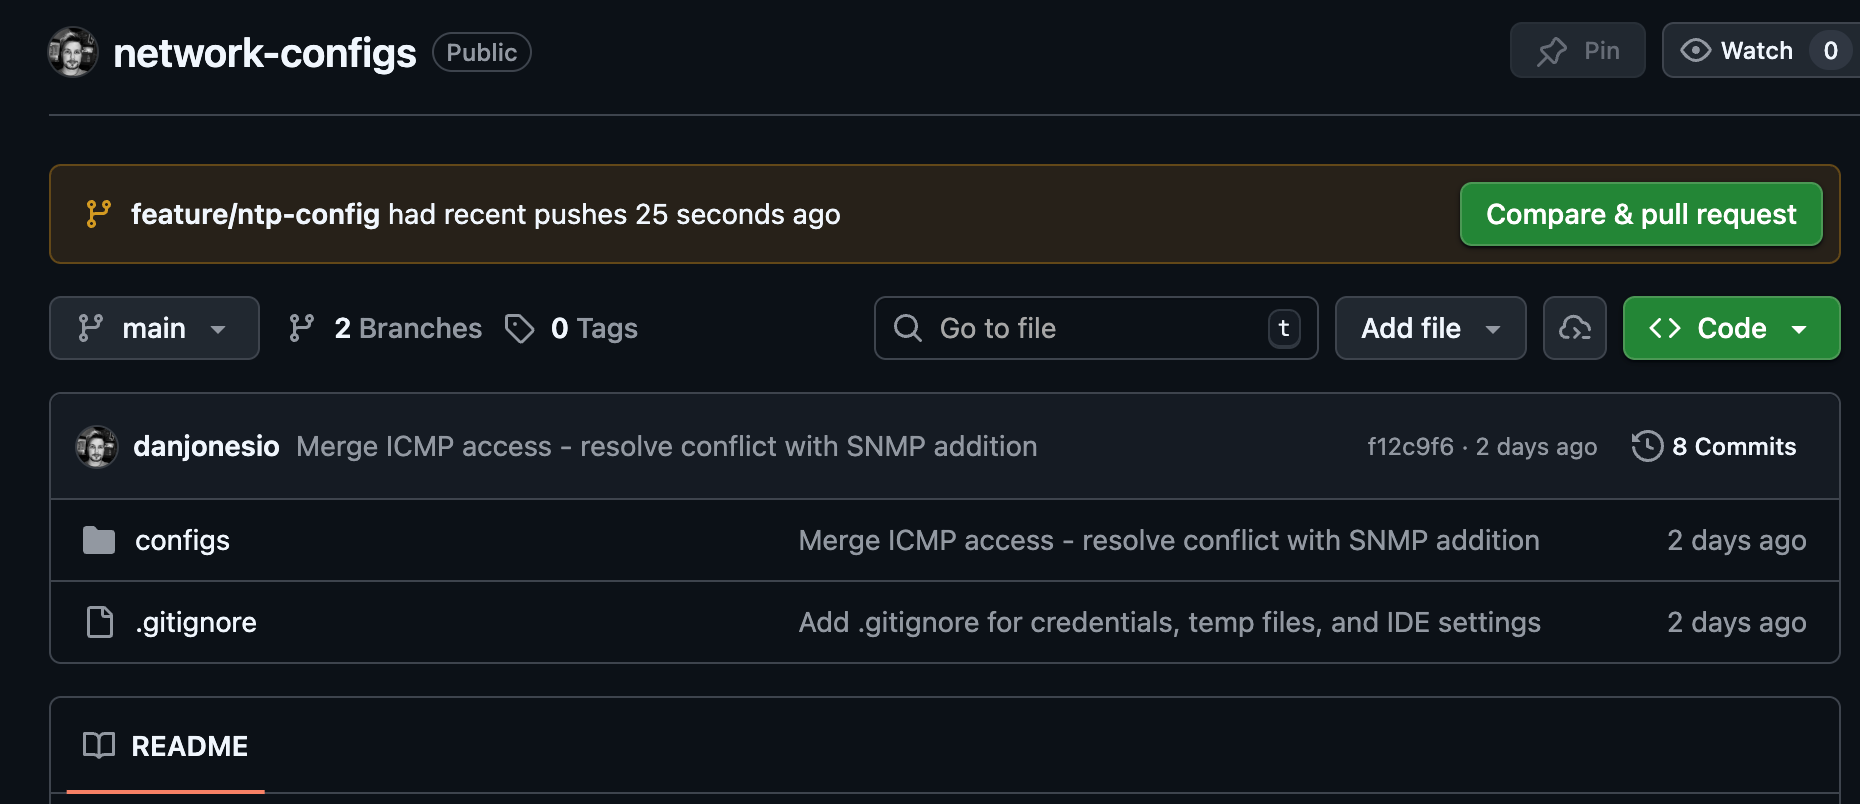
git push origin feature/ntp-config
Now go to GitHub. You'll see a banner saying "feature/ntp-config had recent pushes" with a "Compare & pull request" button. Click it.
Give the PR a meaningful title and description:
- Title: Add NTP configuration with authentication
- Description: Adds NTP config pointing to our management VLAN time servers (10.0.10.10 and 10.0.10.11) with MD5 authentication enabled. This will be applied to all network devices.
Click "Create pull request"
On the PR page, you can see the diff (exactly what changed), leave comments on specific lines, request reviews from team members, and have a discussion before anything touches main.
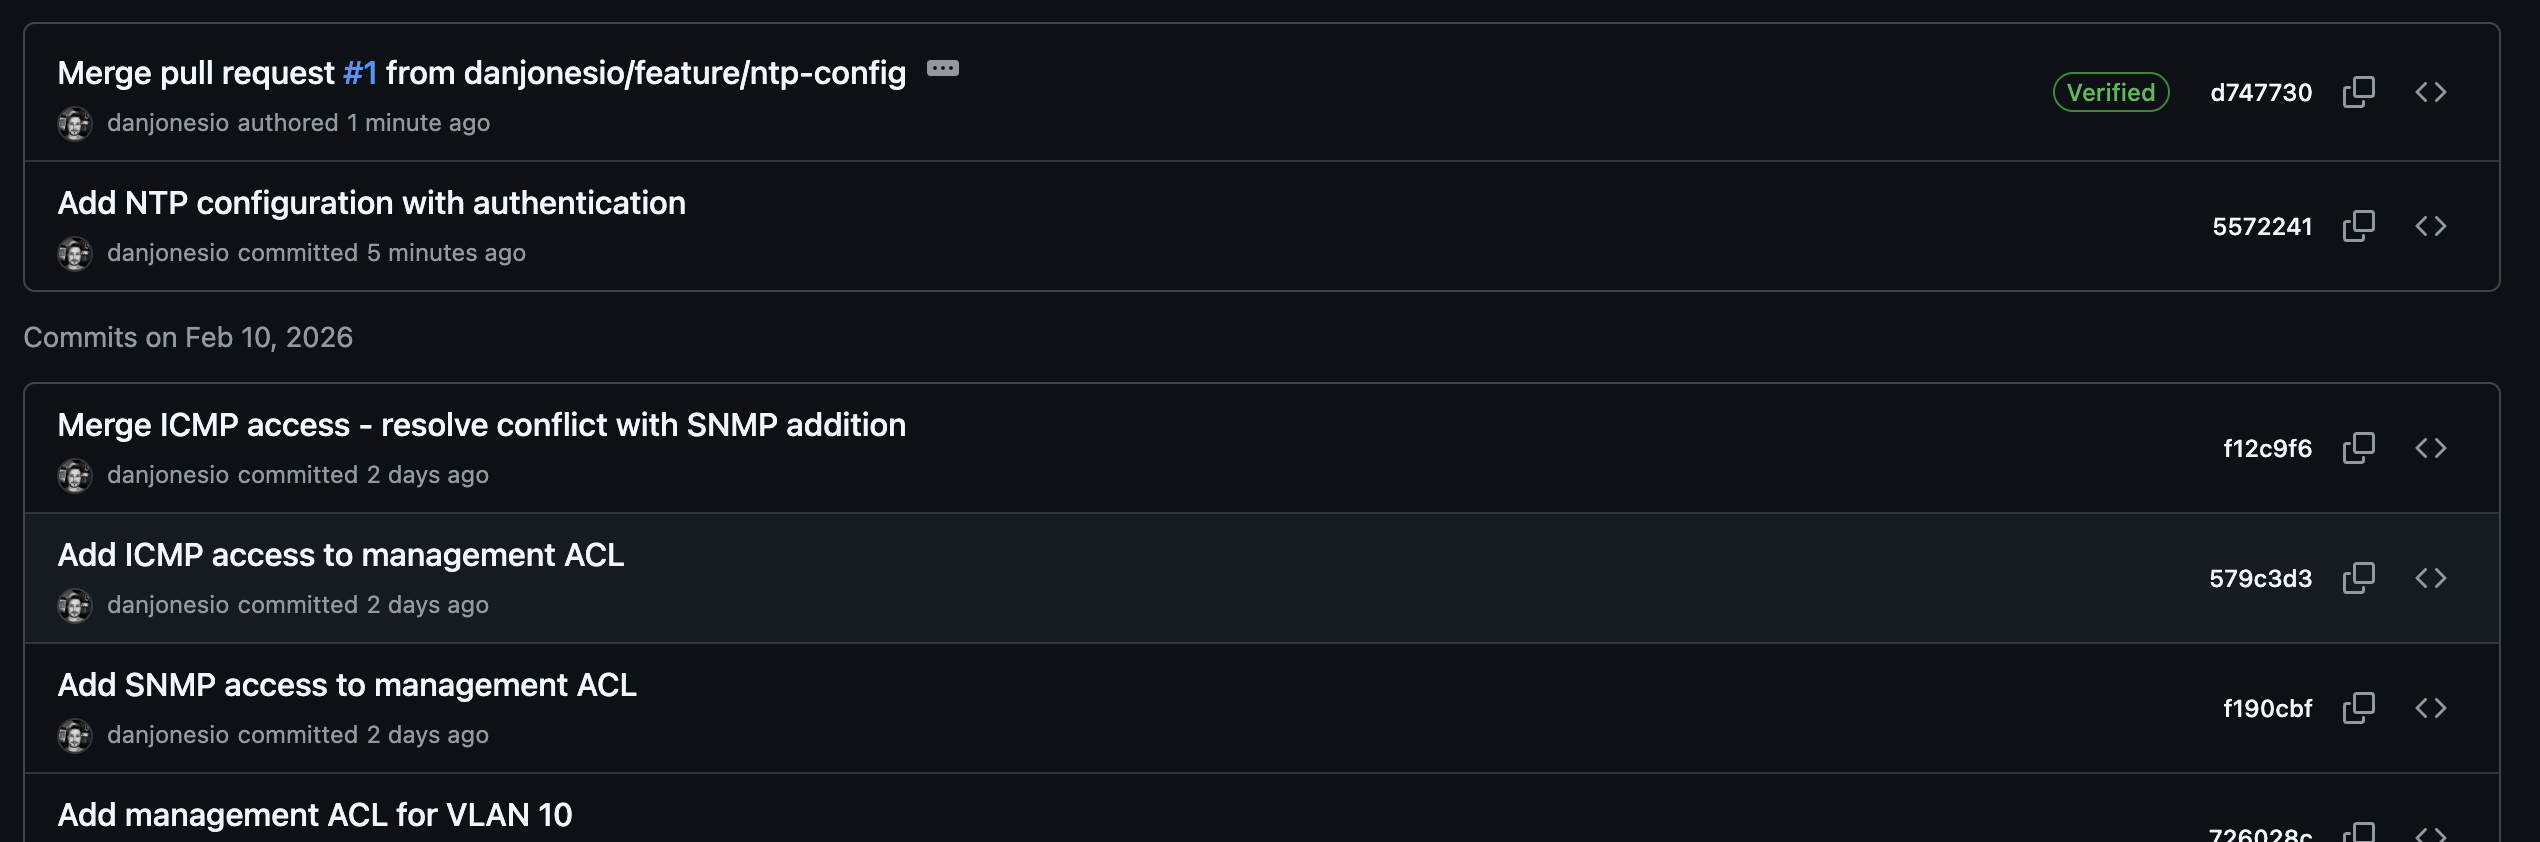
Once you're happy (or once your reviewer approves), hit "Merge pull request" on GitHub. You'll get an option to delete the branch on GitHub. You can delete this branch since it won't be used again.
Within your repo in GitHub, if you select the "Commits" button again, you should now see the merge of the PR.
Then clean up locally:
git switch main
git pull origin main
git branch -D feature/ntp-config
git pull fetches the merged changes from GitHub. Your local main is now up to date.
git pull , an error will flag stating there is no tracking information. This is because of Git not being aware of what branch in the remote maps to what branch locally. To fix this, run
git branch --set-upstream-to=origin/main main and try git pull again, or use the command we have in the code block above.Using -D (uppercase, rather than lowercase) is because of the local repo does not have awareness that the local branch has been merged into main in GitHub. Using a -d here will throw out an error, prompting you to use -D to force delete the branch.
Useful Commands for Day-to-Day Work
Here's a handful of commands that you'll use constantly once Git is part of your workflow.

Also a nifty cheat sheet for your perusal.
See what's changed (before staging):
git diff
See what's staged (before committing):
git diff --staged
Compact commit history:
git log --oneline
See history with a branch graph:
git log --oneline --graph --all
This is useful when multiple branches are in play. You get a visual representation of how branches diverge and merge.
Temporarily shelve your work:
# You're mid-change but need to switch branches urgently
git stash

# Come back later
git stash pop
git stash is like a quick save. It takes your uncommitted changes, stores them, and gives you a clean working directory. git stash pop brings them back.
We'll dive further into this in the next post.
Check which branch you're on:
git branch
The one with the asterisk * is your current branch.
Discard changes to a file (before staging):
git checkout -- configs/core-sw01.cfg
This resets the file to the last committed version. Useful when you've made changes and want to start over. Be careful , this is destructive and can't be undone.
Quick Recap, The Workflow
Here's the day-to-day Git workflow in a nutshell: the loop you'll repeat constantly:
- Pull latest changes:
git pull - Branch for your change:
git switch -c feature/your-change - Make your changes
- Stage them:
git add <files> - Commit with a clear message:
git commit -m "What and why" - Push to GitHub:
git push - Open a PR, get it reviewed, merge
- Clean up: switch back to main, pull, delete the branch.
That's the entire cycle. It becomes second nature quickly.
What's Next
You now have working knowledge of Git, enough to start using it for real projects. You can track configs, collaborate with branches, handle conflicts, and use pull requests for proper change management.
In the next post (completely optional), we go deeper into Git and version control with Git Mastery. We'll go through some more advanced features, the "why and when" to use certain commands, and some more complex scenarios.
The configs you write, the automation scripts you build, the Terraform files you'll create later, they all live in Git. This is the foundation.


